3 Easy Cute Hairstyles for the Gym ♡ Hairstyles 2016! ♡
Need a cute new hairstyle for your workout?
If you’re anything like me, when you workout you want your hair pulled back out of your face. But you also still want your hair to look well put together, so here are my 3 easiest, fastest and fun hairstyles for 2016.
I wear these hairstyles All. The. Time! They’re effective and get the job done, plus they’re so simple I taught my sister how to do all three in just a day.
Watch today’s video below to see how you can throw that beautiful mane of yours up in a jiffy.
Then scroll to the bottom of this post for step-by-step instructions and pictures of each look!
Hope this helps you #DitchTheDrama ! Let me know in the comments section if you’d like to see more posts like this. I love hearing your feedback! And special thanks to Aussie for helping sponsor this content.
The products I used in the video are listed below:
- Aussie Total Miracle Collection 7N1 Shampoo and Conditioner
- Aussie 3 Minute Miracle Strong Conditioning Treatment
Check out the full line of Aussie products on Amazon here: http://spr.ly/Aussie-2711-078
Thanks for watching!
xoxo Liz
3 Easy Hairstyles for the Gym
I’ve outlined each hairstyle below, one by one, highlighting some important tips and traits of each. Which one is your favorite? Tell me in the comments, I’d love to hear your thoughts!
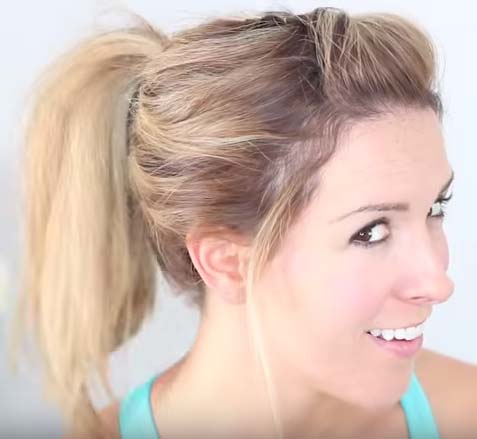
THE RETRO HIGH PONY
For this look, you will need:
2 bobby pins
2 elastics
Grab the front section of your hair by tracing the highest part of your eyebrow arch up and back to form a triangle. Pull the hair up and twist the bottom until about half the hair is tightly twisted. Press gently forward and pin the hair to the top of your head to secure. You can spray with a bit of hairspray to help hold this part in place.
Then separate your hair into top and bottom, and clip the top half up out of the way. Make sure to brush the bottom part tightly and wrap that section up into a hair elastic, securing the ponytail right at the base of the part line.
Gather the top section of hair in with the bottom pony, adjust as needed, and pull the hair together with one final elastic. You can also take a small section of hair out and wrap it around with a third bobby pin to hide the hair elastic.
Great for:
Bangs
Straight hair
Headbands (optional)
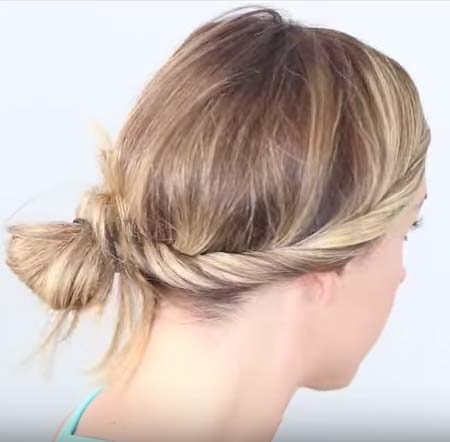
THE FRENCH TWIST MESSY BUN
For this look, you only need:
1 hair elastic
Start by parting your hair however you want to. Then grab a small 1 inch section of hair from the front, twist it tightly as you pull it back and down in the direction you want your twist to form. Slowly add in small sections of hair and twist them together, adding more and more hair until you reach the base of your neck.
I like to take my twist all the way around to the opposite side and throw it in a messy bun. Feel free to do your messy bun however you like yours to look! I do mine by wrapping it around loosely 2-3 times, leaving a few hairs out on the edges for a messier look.
You can spray a bit of hairspray or bobby pin your french twist to ensure it stays, but I’ve found with my hair that it’s not really necessary.
Great for:
Medium to long hair
Soft waves or straight hair
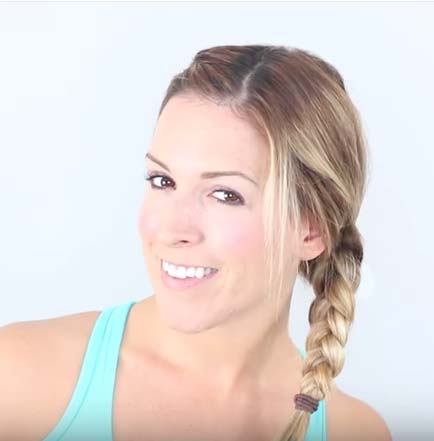
THE WRAPAROUND SIDE BRAID
For this look, you will need:
skills
1 hair elastic
This is the most challenging of the three looks, but I believe in you! You can do it!! And if you can’t, don’t worry, just practice. You will get it soon if you keep practicing!
Start by parting your hair however you want it. I usually do a side part. Grab a small section of hair at the front of your hairline and split it into 3 equal sections. Pull the 3 sections in the direction you want them to go, then alternate one section over the other as you wrap around your head, slowly adding in more hair into each section as you go.
Try to keep the 3 sections as equal as possible as you wrap your french braid around to the back. Once you reach the nape of your neck, you may want to switch your arms around so you don’t have to keep holding that arm straight up in the air (which is quite a challenge, by the way). Just remember which braid section goes under which if you do switch your arm placement here.
You can either throw your hair into a messy bun here, or keep going to complete the entire braid, all the way down. Once you finish the look, secure it with an elastic then go back to loosen and soften the look on top by gently pulling on the braid until it looks exactly how you want it to.
Great for:
Layered haircuts
Any texture of hair
Most hair lengths