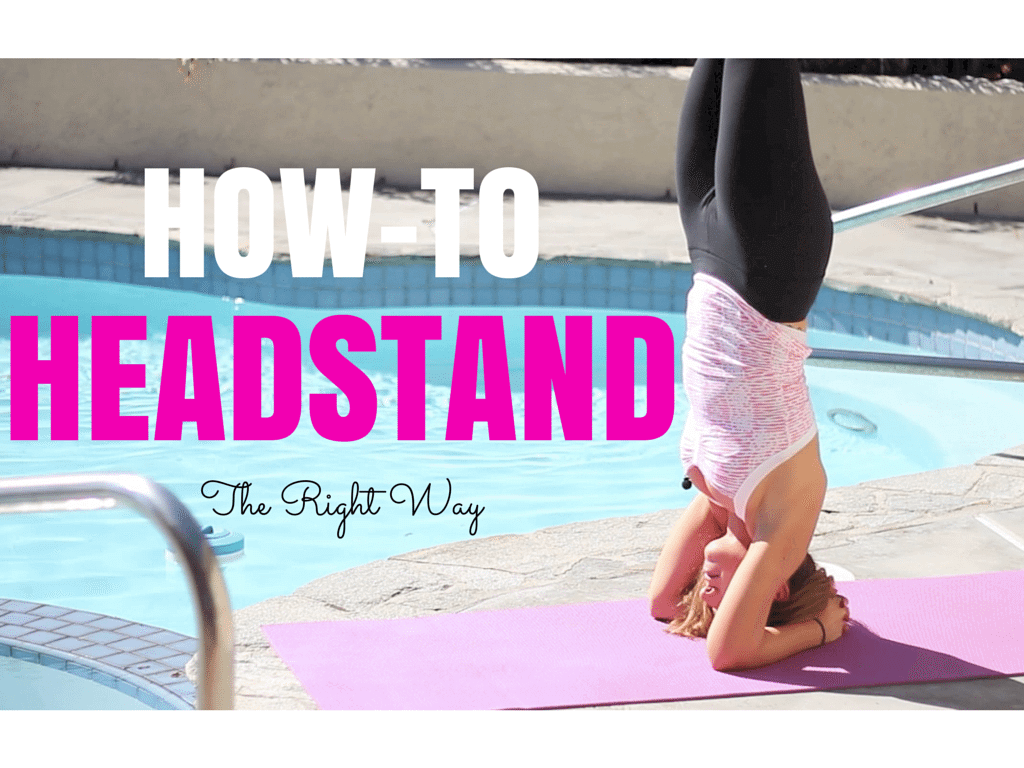
How To Do a Headstand for Beginners | Headstand Tutorial
Have you ever wondered how to Do Headstand for Beginners?
Well I’m here today to teach you!
Note: If you are a complete beginner and totally new to yoga, be sure to only participate in the headstand prep drill to build the strength and flexibility before you move on to the full pose.
I remember the first yoga class I ever went to the yoga teacher had us move our mats against the wall and kick up to get into a headstand…
And let me tell you, it felt wrong. I felt like I was going to hurt myself and there was no instruction other than “just kick up!”
Now here’s the thing…
The problem with kicking up onto a wall is that you aren’t learning how to use your STRENGTH, and instead you’re using momentum with no connection to your core whatsoever.
Ultimately, kicking up doesn’t teach you how to progress into the pose in a safe way and it can be seriously dangerous, often leading to injury.
Learn how to SAFELY and PROPERLY practice headstand for beginners without using a wall in this headstand tutorial video.
I will teach you everything you need to know in order to progress your headstand until you can fully extend both legs into the air.
Only progress to the point where you feel comfortable, listen to your body and have patience before you move into full headstand.
Read the full directions below and remember to GO SLOWLY engaging your core the whole time…
1) Place your elbows to the ground and measure your hands to the opposite shoulder. Then, place your forearms on the ground, interlacing your fingers, stacking your pinky fingers one in front of the other. Externally rotate your armpits towards one another, and maintain space in your elbows and arm pits. Place the crown of your head to the ground between your arms so the back of your head is up against your hands.
2) Maintain the external rotation in your arms and press your hands, wrists and forearms into the ground. Slowly walk your feet towards your face to stack your hips directly over your shoulders.
3) Lift one leg up of the ground, bringing in it to your chest. Then WITHOUT kicking lift the other leg up using your core, bringing the other leg into your chest. Stay here for a few breaths.
4) Once you are comfortable with 3, move your hips back past your shoulders as you raise your shins to the sky. Keep your heels tight into your glutes and continue to press through your arms and hands. Stay here for a few breaths.
5) If you are comfortable with 4 continue to press through the arms and hands as you lift your knees up keeping your heels close into your glutes.
6) Only if you’re comfortable with 5 then continue to press well through the arms and hands as you finally lift your feet all the way up. Press well through the arms, wrists and hands to create the lift all through the body all the way to the feet.
7) Come out the same way you came in. Slowly lower your feet back, your hips move back as you lower your knees and then slowly the feet land.
8) Lastly, rest in child’s pose to relax your neck. Slowly come up with your head last.
Practice and stay patient. Before you know it you’ll be hangin’ out in headstand! 😉
xo, Sara
P.S. Wondering what the benefits are to a regular headstand practice?
Check out these 10 amazing health benefits of headstands.


Comments are closed.