How To Make Your Own Custom Greeting Cards
This post is sponsored by Canon. All comments and opinions are my own. #ad
Sara and I are both blessed to be summer babies, along with many of my friends, and it feels like I’ve been celebrating everyone’s birthdays now for a whole month!
When we were younger we used to throw pool parties…
Nowadays, we still throw pool parties. 😉
But this year I also wanted to bring each person’s “new year” with love, joy and lots of great memories.
One of my favorite ways to do this is to make custom cards!
So today I thought I’d share how I do this in case any of you out there want to do the same…
Making a custom card for someone is actually really simple, and the impact it has is really fun and memorable.
I love seeing people’s faces light up when they get a custom card instead of a store-bought one!
Plus I always feel like I’m the person who’s scrambling last minute to run out and buy birthday cards, so always being able to make them at home makes that whole process so much easier…
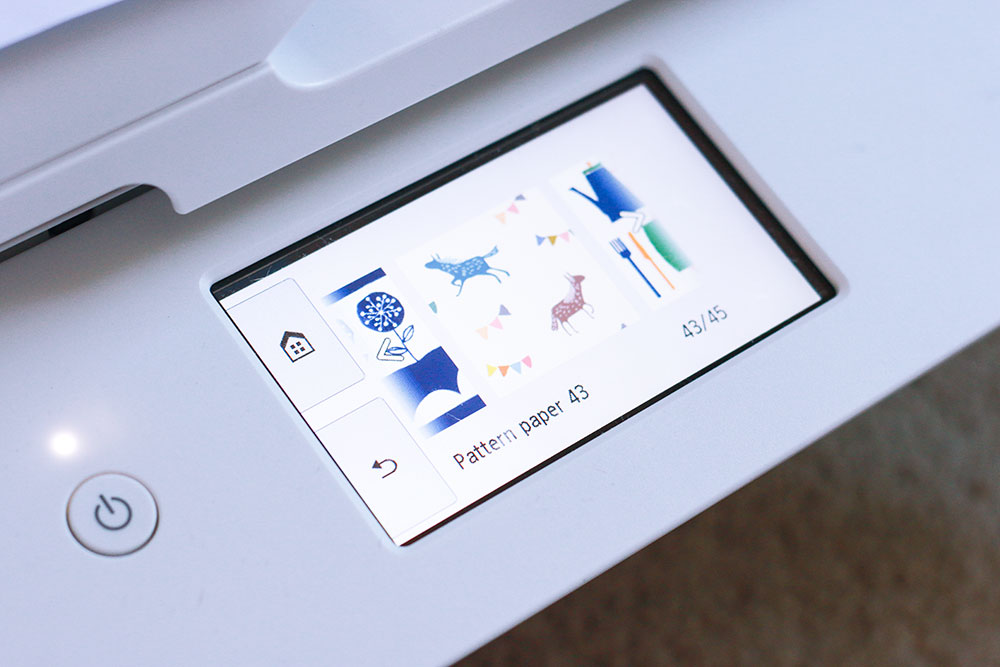
Luckily @CanonUSA came out with their new PIXMA TS9521C printer a while ago. It easily prints greeting cards, photos, magnets, stickers, and much more all from the comfort of your own home.
I made a post a while back about this printer, but it’s the best thing in the world.
It seriously makes gift giving and decorating so easy and fun!
It’s known as the “Crafter’s All-In-One Printer” so it’s a great option for all you scrapbookers out there too.
You can print patterned backgrounds for your scrapbooks, calendars, checklists, music sheets and even graph paper.
Graph paper! Who knew…
#CraftyWithCanon
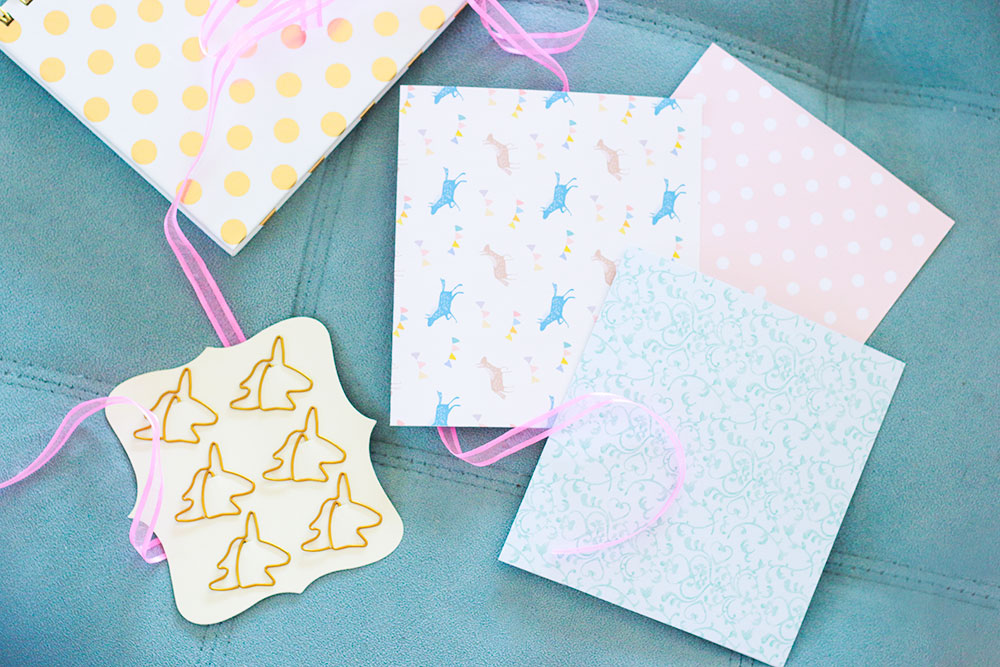
This year for Sara’s birthday, as well as a few of my friends, I printed out some custom patterns to make cards out of and they were really fun to customize.
I thought about making party invitations too, but that will have to wait until next year or maybe for Sara’s upcoming baby shower 🙂
Once you have the PIXMA TS9521C printer, all you have to do is go to Canon’s “Creative Park” : http://canon.com/c-park/ to find various card layouts.
There are also some that come standard inside the printer itself, but if you want more options check out the Creative Park.
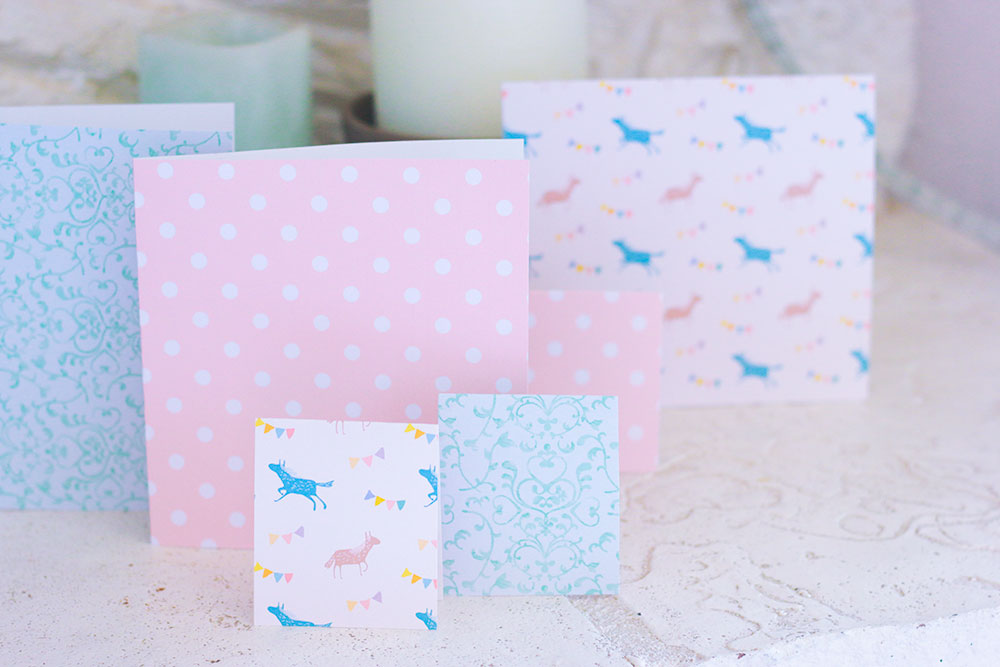
- I used the matte 8.5″ x 11″ letter paper for this project
In the Creative Park, you’ll also find templates for stationary, envelopes, mini cards, pop-up cards and more…
I am continually amazed at how much this printer can make!
I like to keep it simple, so I just used the standard patterned prints, chose the ones I liked the best and printed a full 8.5″ x 11″ page.
Then I just folded them in have, trimmed off the edges (which ended up making cute little gift tags too) and wrote my birthday notes on the inside!
Believe it or not, that’s it. This project was so easy and fun, and if you like crafting you’re going to love having one of these printers.
It’s so simple and this process took me about 10-15 minutes total.
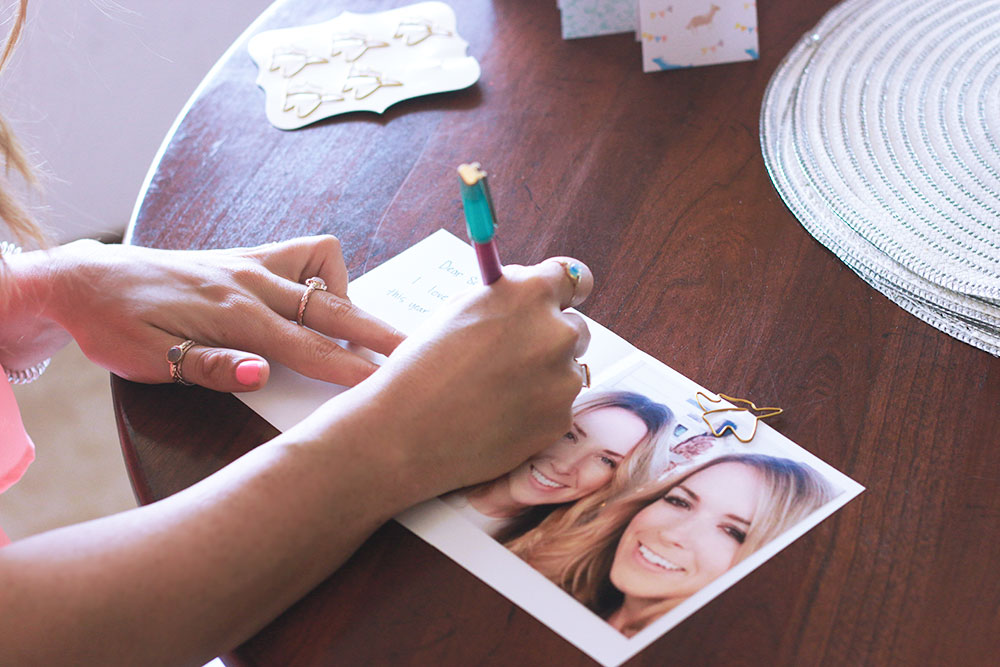
Once I had the card stock printed, I clipped on a custom photo of each person that captured one of my favorite moments with them.
I found cute little unicorn paper clips (because why not) and clipped the photo to the card so they can take it off and hang it wherever they want!
Then I wrote each person a heartfelt note, wishing them the best birthday ever and reminding them each how much they mean to me and how fun our time together has been.
This is a really simple way to do a little “extra” to show someone you really care.
A little effort goes a long way, and thanks to @CanonUSA this process is super simple!
So that’s it! I hope you guys like it…
There are lots of fun creative ways you can express your love and memories with @CanonUSA, and I am excited to see what you guys come up with.
Let me know if you get one and tag us in your projects!
Enjoy,
Liz
Facebook: @CanonUSA
Twitter: @CanonUSAImaging
Instagram: @CanonUSA